Brief Tutorial
Before using the Peachtree Inventory Adjuster on your own data, you should play around with it
using the sample Bellwether Garden Supply data that is normally included when you install
Peachtree. If you don't have this data on your system, you will need to reinstall Peachtree.
Back up the Bellwether Garden Supply data before starting this brief tutorial so that you can
restore the data to its original state later.
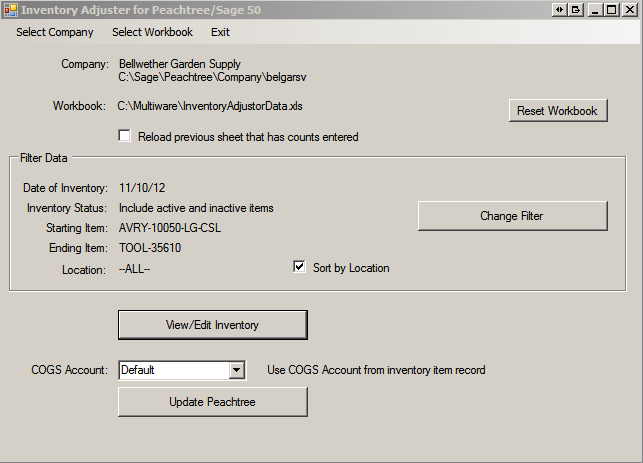
When you start the application, this screen appears:
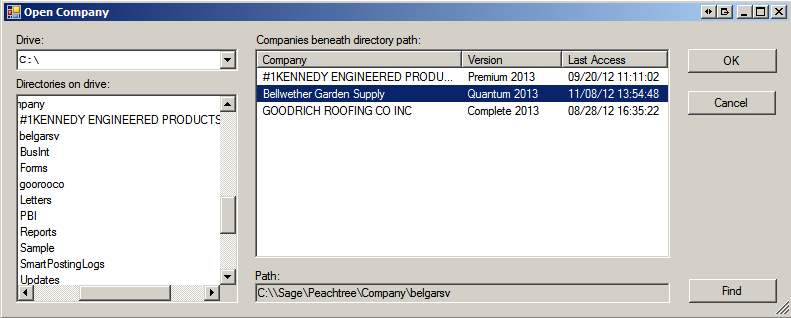
If the company shown is not Bellwether Garden Supply, click the Select Company button to get
the Select Company form:
The default directory for Peachtree will be shown when this form starts. Normally Bellwether
Garden Supply will show in the Company Name panel on the left. If for some reason it is located
in another directory, use the Drives and Directories lists to select its location. Click on the
company name so it is highlighted as shown above, then click the OK button.
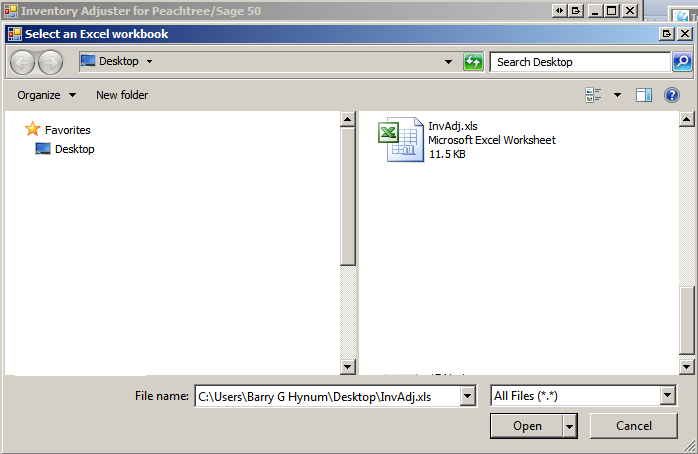
Click the Select Worksheet button to choose the workbook you want to work in:
The inventory adjuster creates a default spreadsheet named PeachtreeInventoryAdjustment.xls
that is located in the directory where the application was installed.
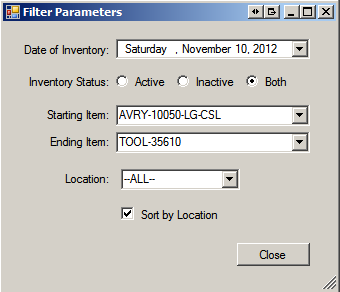
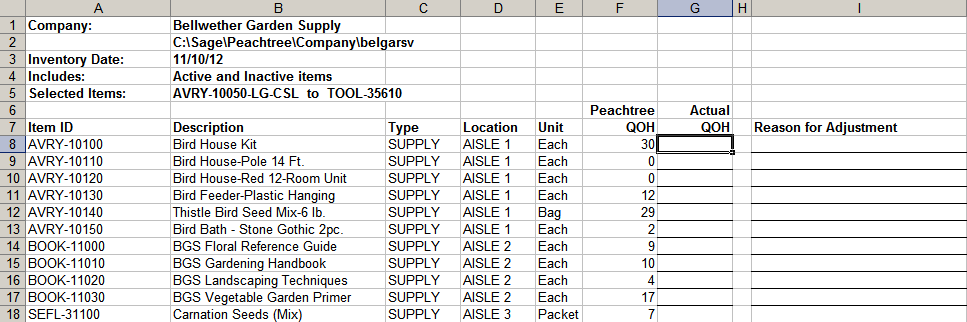
The default filter includes all items that are active. We'll change the filter to select only the records
that have an ItemID beginning with "B". Click the Change Filter button:
You can also set the filter to select only Inactive items or all items and can define a filter mask for
the Item Type and the Location. Click OK to set the filter.
You can select a COGS account using the drop-down list on the main form. We'll use the item-specific COGS accounts rather than overriding the accounts.
Now we are ready to work with the data in Excel. Click the View/Edit Inventory button. This will
start the specified Excel workbook, delete the spreadsheet PeachtreeInventoryAdjustment.xls, if it
exists, create a new spreadsheet with the same name, and load it with the latest data from
Peachtree. (If [Reload previous sheet that has counts entered] is checked, the spreadsheet will
not be deleted nor will it be updated with the latest data from Peachtree. This feature is provided
to allow you to pull up the last spreadsheet values.)
Now lets suppose we did a physical count of the BOOK items and need to adjust the last two. In
the Actual column enter 5 for BOOK-11020 and 15 for BOOK-11030. Save the workbook.
We are now ready to adjust the quantities in your company data. Click the [Update Peachtree]
button. If the Peachtree posting method is set to batch or smartposting, un-posted Inventory
Adjustment Journal transactions will be created to adjust your company data and you will need to post the Inventory Adjustment Journal in Peachtree to complete processing of the transactions.
If the Peachtree posting method is set to real-time, then it isn't possible to insert the transactions
directly into the company data. Instead a Peachtree Import file ADJUST.CSV is created and you
must manually import the data in Peachtree to process the transactions. ADJUST.CSV will be in
your Documents folder.
In Peachtree complete the transactions: If the Peachtree posting method is set to real-time,
import the file ADJUST.CSV. If the Peachtree posting method is set to batch or smartposting,
post the Inventory Adjustment Journal.
Exit from the inventory adjuster and start it again. Notice that the company, workbook name, filter
values and [Date of Inventory] have all been preserved from your previous session. Click the [View/Edit Inventory] button to view the spreadsheet again. Notice that the Peachtree quantities
are now the new ones you set from the last session.
This is a good time to experiment on your own. Try entering different filters and changing the
counts. When you feel comfortable with the inventory adjuster, you are ready to try it on your own
company's data.